Updated: Apr 25, 2020
Do you have a B 880 PLUS or a B 880? Have you used your shape designer yet? Because if you haven’t I am going to BLOW YOUR MIND with this tutorial on how to design your own embroidery motif right from your machine using the simple sewing stitches that are already built in!

That’s right! This gorgeous design was built using my favorite sewing stitches and simply playing around with the shape design feature in the machine! It looks hand done, it looks laborious and expensive but don’t worry….I am going to show you below how truly easy this design is to build. From there you can turn it into a pillow (instructions below), table topper, wall hanging, whatever you like.

This pillow is Alfred approved, which sounds silly but he’s truly the pickiest dog ever about what pillows and blankets make the cut for a snuggle. Now you see why there are so many dog (and cat) hairs on the couch.
Post contains affiliate links. When you get your supplies from the links in this post I make a small portion of the sale, which keeps Tough Kitten Crafts running and keeps new projects hitting the blog! Thank you so much for doing your purchasing through my links and supporting TKC. -Kate
Supplies:
-Jumbo hoop
-Linen fabric, at least 17″ x 24″
–OESD Fusible Woven Stabilizer (size to match fabric)
–OESD Fusible Fleece (size to match fabric)
–OESD Ultra Clean and Tear (Size to match the bottom of the hoop)
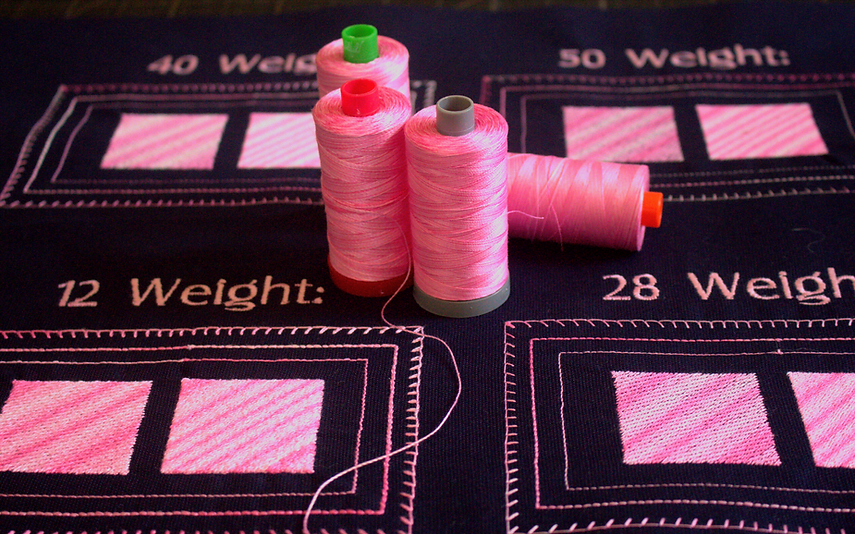
–Aurifil 50wt Cotton Thread in Various Colors
–75/11 Titanium Embroidery Needles
Optional, if making a pillow like mine:
-Tassel trim to match pillow
-Pillow backing fabric
1. Prep your linen fabric as desired (I am an avid starcher).
2. Fuse your fusible woven to the wrong side of your linen, then fuse the fusible fleece to on top of the fusible woven (all on the wrong side).
3. Hoop your fabric right side up.
4. Take a piece of tearaway stabilizer (the size of the stitch area) and using embroidery tape, affix it to the back of the hoop; this is called “floating” your stabilizer. Be careful to ensure it doesn’t bend or get caught up underneath the hoop as you connect it to the machine.
5. Set hoop and fabric aside while we create your design in the machine.

6. Open your embroidery files on the machine. Choose the third folder your “sewing stitches” folder.

7. Choose the second folder “Decorative stitches”

8. Choose folder 1201

9. Select stitch #1

10. With the stitch in your hoop tap the information icon

11. Tap the shape designer icon.

12. In shape designer, choose the circle shape, hit the + sign to 6 repeats and decrease the size of the shape to 40%. Then click “ok” (the green check)

13. Now we will go get another motif to shape. Tap the plus sign and retrieve that same stitch again.

14. Increase the repeats to 12 and increase the circle size to 105%. Then tap “OK”

15. First, go change your hoop size to the large oval. You can go to Jumbo now if you like but I like sizing up slowly so I can see what I am doing better. Then tap the “add motif” plus sign again.

16. Go to folder 701.

17. Select stitch 32. There is another stitch that looks like this one but is bigger, so be careful you choose the correct stitch.

18. Once again we will go to the shape designer icon. Now we are not only going to increase to 12 repeats and make the size of our circle 65%, we are also going to hit the +90 button to turn our motif so it looks like the one above. Tap the OK button when done.

19. Once again we are going to go retrieve another decorative stitch. (Tap the add motif plus sign) Open folder 401 and choose stitch #5.

20. You’re old hat at this by now right? You know we head back into our stitch designer icon and match our machines to what I have here; 12 repeats, decrease the circle to 80% and then hit “OK”

21. Let’s go grab yet another motif. Don’t forget to hit the plus sign on the screen or else you could lose your design! Head into folder 601 and grab stitch #50 (it will look like two circles but come out as one)

22. Back into our shape designer, select 12 repeats and they should be perfectly placed on our previous stitch, so just tap “OK”

23. Still a few more motifs to add so let’s go grab another one. Folder 801, stitch #5.

24. Back in shape designer we will do 6 repeats, increase our circle to 105% and tap the +90 button three times, until the arcs look like the arcs in the photo above. Once again, tap okay when you’re happy with what it looks like.

25. The next motif we are adding is this great diamond shape. Find it in folder 401, stitch 30. Before going into shape designer change to the jumbo hoop, using the menus to the left of the screen.

26. Once you have changed to the jumbo hoop we can head over to shape designer. Increase to 18 repeats, decrease our circle to 80% and turn it by hitting the +90 button once.

27. Almost there! Choose stitch number 26 (your machine should have kept folder 401 on the screen)

28. This time we will go to a whopping 41 repeats! We will also increase the circle to 105% and turn it twice using the +90 button.

29. Let’s get our last motif! Folder 1001, stitch number 14. This is a bigger version of the stitch we used previously.

30. We finally get to change the shape! Woohoooo! Go to the rainbow shape, 8 repeats and hit the +90 button until they match the above photo. Do you see how our shape is no longer the same % length and width? You do this by tapping the link icon in between the two. Once you do this you can adjust the two sizes separately which allows you to make ovals, rectangles,etc. We are gonna make our arc shape a bit flatter by changing the width to 105% and the height to 60%.
Drag the arc to the top of your motif, just roughly for now.
Then hit ok.

31. You can double check the placement of your arc by tapping the move motif on your information screen.

32. This is what I chose, but adjust it how you think it looks best. X:0 means I know it is centered, which is very important to me. If you see a number there, tap in the middle of the box to reset to zero.

33. Now go back out to the information screen and tap the “duplicate” icon.
You will see a second motif pop up in the center of the screen.

34. Tap the mirror image down/up icon. Now we have two perfectly matching arcs.

35. It did not allow me to have the bottom arc perfectly centered on the x axis like it did with the top. This was roughly what I had chosen for my bottom arc but once again, use what looks right to you.

36. YOU DID IT! You are done designing your motif. So let’s get to stitchin’

Change colors as you see fit. You can stitch all in one color, ombre, rainbow, you name it! I grabbed 6 of my FAVORITE Aurifil 50 wt spools and changed them per row (minus the arcs that I changed every other arc). People are so shocked to hear that they can embroider with their favorite piecing thread but I love using Aurifil! I have used 12 wt (wool and cotton!), 40 wt and 50 wt in my embroidery machine and each one stitched out GORGEOUS.

All finished! So much fun to design…but let’s get this baby movin’

I cut mine out into a circular shape. I had NO pans, plates, templates, anything at home that was big enough. Soooooo I used a hand quilting hoop…that was for sale at Joann’s. Yeah. I totally knelt down and used it right in the store on their floor, in the isle. I bought this trim and the pen I used so I felt like it was an okay trade?
ANYWHOOOOOO…once I had my circle marked and cut out, I added this cute trim that matched my pillow.
Don’t be like me. Don’t go adding quilting cotton to the back and think life will be okay. I had to rip the pillow apart because the back was a soggy mess compared to the interfaced front and sturdy trim.

So let’s do this correctly! Choose your backing fabric (Mine is an Indah Batik by Me + You Fabrics design 126-391-Blush) and quilted it with some Soft and Stable by Annie behind it. This is a great time to show off your quilting genius or keep it simple like I did, it’s up to you. I recommend quilting first then cutting it out to size to account for any shrinkage that can happen through the quilting process.
Sew the front to the back, being careful to not catch your tassels in the seam. Leave an opening to turn and yes…you do have to hand sew it closed, I have not found an attractive way to do this on the machine.

And there ya have it! A pillow you have literally built yourself, from the individual stitches up! It’s a really satisfying feeling and I encourage you to play around with some designs of your own. I love playing with the shape designer and I think you will too.
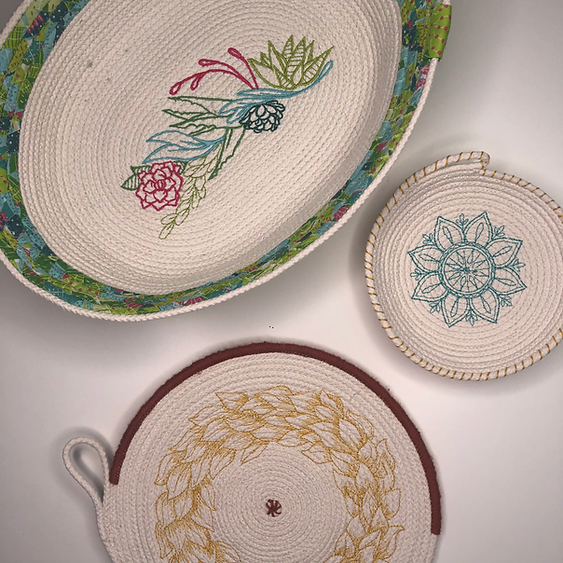
Here are home other designs I whipped up really quickly to show you what can be possible:

Those floating triangles are thanks to the star shape!

I love how vintage this one looks. Hitting the “mirror image” icon in shape designer gave me that great wavy border! It flips every other design.

This is the most complicated of the three. I think there will be a tutorial on this guy in the near future because he combines endless embroidery, shaping AND double shaping! That’s right…I made a shape and then shaped that shape!

Whether you stitch out one of my designs or create your own please use the hashtag #creativewomenrock and #toughkittencrafts when sharing your projects. I would absolutely love to see them!
xoxo kate