Updated: Sep 14, 2020
The BERNINA Stitch Regulator is the stitch regulating accessory that is both coveted and confusing for some. Let’s demystify it shall we?

What is the BSR?
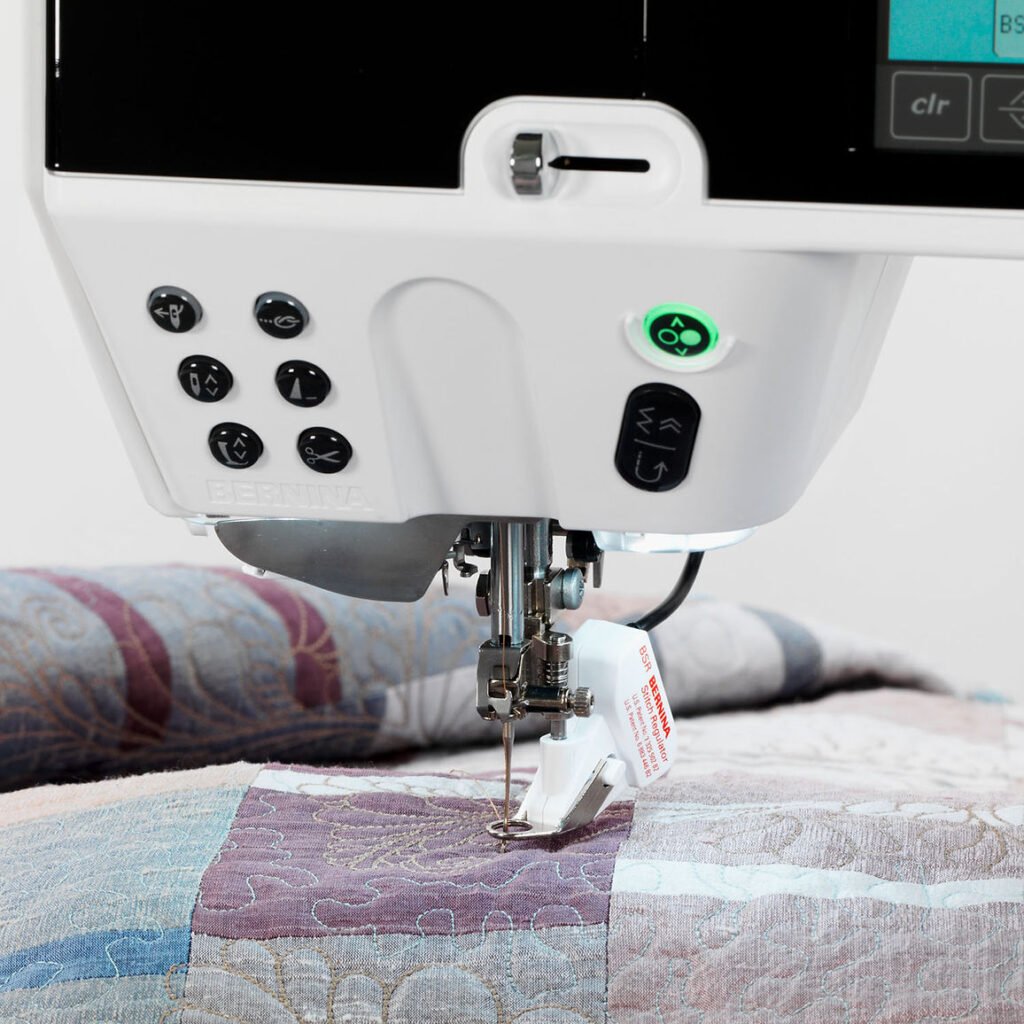
The BERNINA Stitch Regulator, more often known as BSR, is an attachment that works with certain BERNINA sewing machines to create stitches that are the same length as you free motion stitch. This attachment regulates the size of your stitches for you as opposed to traditional method where you, the sewist, regulate the stitches yourself (as is common with thread painting and free motion quilting).
Ralph Koerner created this stitch regulating foot for his wife as a way to help her finish her quilts (husband of the decade, right?!) and then sold his invention to BERNINA. The BSR is still an exclusive feature for domestic machines that is an incredible draw for BERNINA.

Note About the Long & Mid Arms
The BSR as we talk about it here is an attachment for domestic BERNINA machines but it is worth mentioning that the BERNINA long & mid arm machines also have the BERNINA Stitch regulator. On the Q24, Q20 and new Q16 model there are two stitch regulators mounted underneath the stitch plate, this results in even more sensitive, even more accurate stitch regulation.
As someone who worked on BERNINA long arms for 3 years, I feel compelled to tell you that between the BSR on the domestic machines to the stitch regulation on the Q series machines, the Q series is a clear winner in smoothness and ease of use. Personally, from what I have tried with other brands, there is no comparison on the market for the smoothness and lightweight feel that the Q Series long and mid arms provide. For me, it’s truly flawless.

Parts of the BSR:
There are three main parts of the BSR, so let’s go over them.
-Plug
You will see that the BSR has a plug attached, it looks like some headphones! (Do ANY headphone still look like that or am I just very ’90s?) Once you attach the foot, as you would every other BERNINA foot, you will plug this into the machine. Your BSR outlet may be underneath the head of the machine, near where the foot attaches, or on the back of your machine; it will be denoted “BSR” or have a little graphic of the BSR.

-Sensor
The sensor is housed within the white box portion of the foot (the main part of the foot) and you can see the little window on the bottom. This little window is what will “see” the movement of your fabric and tell the machine to stitch.

-Soles
Your BSR comes with three soles that clip onto the foot via the white buttons on either side of the foot. From left to right they are: Closed Metal sole
This is a standard free motion foot that is great for quilting or thread painting. This is the most familiar to quilters and thread painters as it is similar to a #9, #15 or #26 foot.
Open Metal Sole
This foot has an opening at the front so you may see where you are going as you stitch. This sole is similar to the #24 foot or #73 foot which is why it’s my preferred sole as those are my favorite free motion feet. To me, it makes it MUCH easier to quilt when you can see where you are stitching and where you have stitched.
Clear Sole
This large, cupped sole moves excellently over raised areas making it a favorite for those who are art quilters, who quilting over applique/ornamentation on quilts or who like to use thicker batting. This clear sole closely resembles the #44 Echo Quilting Foot and allows for great visibility as you quilt larger designs. The concentric circles and cross hairs give a great point of reference when free motion quilting, especially if you are echo quilting.

The BSR Screen: When you plug in your BSR you will get a screen similar to this:

If you do not see this screen then your BSR is not plugged into the machine correctly.
In the stitches folder you can see you have the option to straight stitch or zig-zag (Please try it! It’s so fun!).
BSR also has two modes, 1 or 2, you know a mode is chosen when it is dark grey (the button looks depressed)
Mode One
Mode one is my preferred mode, but I don’t think you should start here.
In mode one the needle will keep moving whether you are moving the fabric or not. I love this mode because it helps keep your free motion quilting smooth and facilitate the stitching of smaller motifs.
Mode Two This is the mode I recommend while you get comfortable using the stitch regulator. In Mode two the needle stops when you stop moving the fabric, this is typically less stressful for stitchers as they get used to the feel of free motion with the BSR.

This is an affiliate link. Thank you for supporting TKC.
Want even more info about the BSR? Check out my Facebook live below.
Every week I go live in the the Tough Kitten Crafts FB Group and I hope you join us! You can ask your questions live and enjoy hanging out with this awesome crowd.
Hop into the FB group and ask your BSR questions today!
Click here to join the Tough Kitten Crafts FB Group.
Want to watch this video in the FB Group? Click here for a direct link!


