

Are you new to machine embroidery and not sure where to start? Maybe you’re so new you don’t even have a machine yet. That’s okay! No matter how early you are in your machine embroidery journey this is the series for you. In this 5 part series I will take you from buying your machine, all the way to embroidering your first projects.
Machine Embroidery for Beginners: How to get started
Week 1: Best Embroidery Machines for Beginners
Week 2: Choosing Fabric for Machine Embroidery
Week 3: Machine Embroidery Designs
Week 4: Intro to Machine Embroidery Stabilizers and Notions
Week 5: Getting Started with Machine Embroidery: Putting it All Together
Last week we talked machines (cause it’s the MOST important thing you need for machine embroidery) and now we need to talk about what you’ll embroider on.

What materials should you get as a beginner? 1. Quilting Cotton
Arguably the easiest material to find, work with and embroider on quilting cotton is a great place to start with your machine embroidery journey.
Tip: Use Fusible Woven with your quilting cotton embroidery. It will give your fabric great body and help make your embroidery look even better.
2. Knits
For reason we tend to think as beginners that t-shirts should be hard but that’s just not true. A simple embroidered t-shirt is a great way to get comfortable with your machine and embroidery.
Tip: T shirts won’t hold up to stitch dense or very large designs, save more dense designs for sweaters.
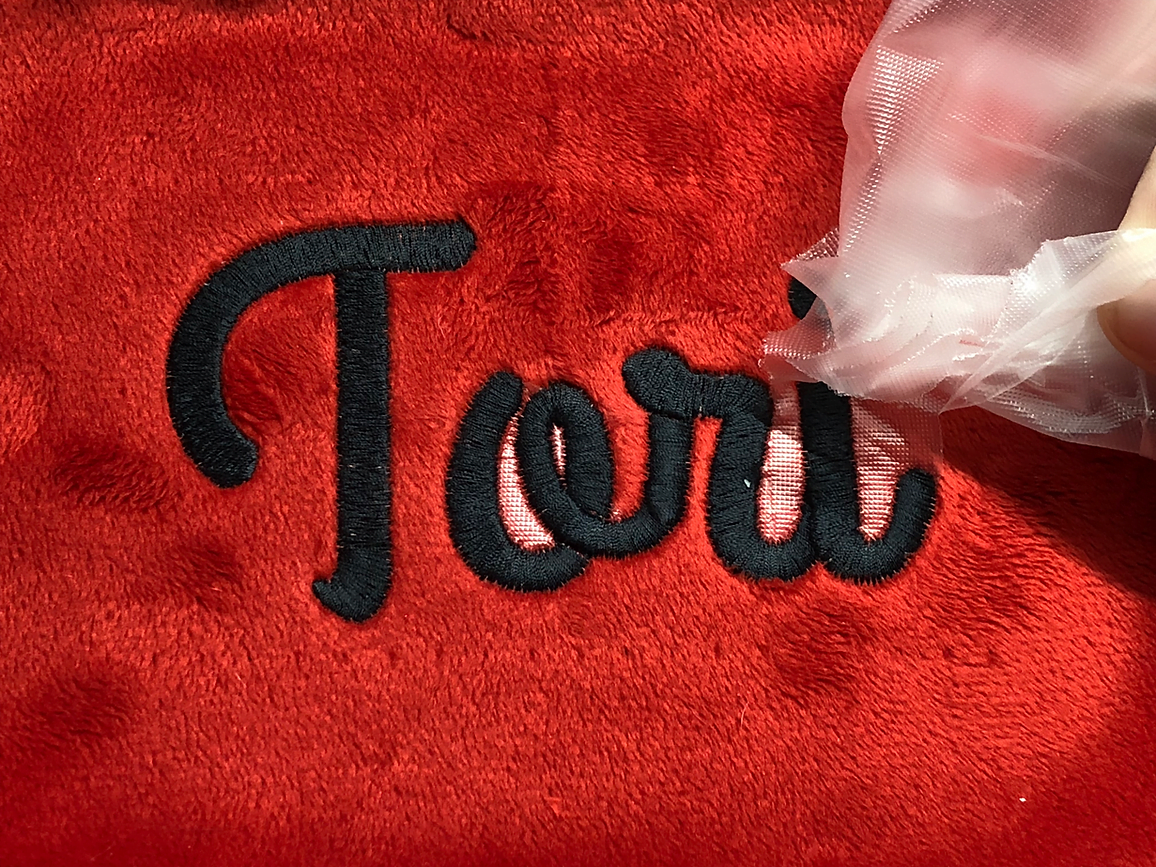
3. Toweling
Terry Cloth towels are a great way to stretch your legs and learn to machine embroider on knapped fabric.
Tip: Consider this: will the towel be used by guests or will these be the towels guests know they’d get in trouble for wiping their hands on? This may affect your stabilizer choices.

Fun Materials to Use in Machine Embroidery
Ready to kick your machine embroidery up a notch? Try out these fun materials.
1. Cork
Whether you are making luggage tags, key fobs or notebook covers, cork can make your machine embroidery look even more impressive.
This material needs a few special considerations like how to hoop it (float method) and the type of needle (I like a topstitch) but it’s really fun and super easy to use!
Make the Boutique Key Fobs from Scissortail Stitches for a fun way to try out cork.
2. Vinyl
Much like cork, vinyl adds a very impressive, professional touch that can really change a project.
I have fallen in love with this new vinyl from OESD; You can wash it and iron it! It comes in gorgeous colors and it’s such a game changer for your in the hoop projects, appliques and more. These Tapestry Cork Wallets would also be gorgeous in vinyl!
3. Cardstock
Embroidered cards are a thoughtful, handmade touch that is sure to impress the recipient. Fortunately for us OESD has greatly expanded their getting card designs. The bonus with this is each and every collection comes with instructions to walk you through step by step.
Check out the Greeting Card Bundle!
Three things that will change depending on your material:
1. Needle
Just like any sewing project you have to match the needle to the fabric and thread weight. Denim, knits and Free Standing lace would all use different types of needles to best complete the project.
2. How to Hoop
Material that can be damaged by or are too thick to use standard hooping should always be floated; these could be materials like cork, vinyl, thick bath towels, silk and more. You also may not be able to do a standard hooping on your project if it’s not big enough for the hoop like a collar point or napkin corner.
My class Super Hooper gives you the tools to help you fight back against Bad Hooping, saving your embroidery. This $17 course gives you all the skills you need to perfectly hoop any type of fabric, in any style.
3. Stabilizers
Does that material have stretch? Is it see through? Is it heavy weight material or thin? Is it a knapped fabric?
All of these things and more will effect what stabilizers you choose to use on your project. Stabilizer is the number one thing that confuses newbies and ruins embroidery.
I have lots of blog posts to help you learn about machine embroidery stabilizers: Machine Embroidery Stabilizer Basics, Stabilizer Breakdown: Categories, Weights and Types and The Two Most Important Things to Consider When Choosing Your Embroidery Stabilizer.

Need more help? Check out Stabilizer School! This course will help you how to choose the perfect stabilizer for every project using the M.U.S.H.Y. method. This class will also help you better understand stabilizers and give you a library of stabilizers so that you know exactly how to use each and every stabilizer.
Want Stabilizer School and Super Hooper? Get the Super School Bundle! This bundle gets you access to both Super Hooper and Stabilizer School PLUS their workbooks for the incredible price of $99 (a $270 value). These two courses will empower you to start improving your embroidery today through better hooping and finally being able to choose the perfect stabilizer for your projects.

Next week in this series we will go over Machine Embroidery designs like where to get them, how to store/organize them and even how to download embroidery designs.
What fabrics have you used for machine embroidery? What fabrics are you exciting to learn to embroider on? Comment below and let me know!
See you next week,
xoxo Kate

One Response
If we buy these classes are they available anytime and mine to keep